

Views: 0 Author: Site Editor Publish Time: 2026-08-21 Origin: Site


The transition from traditional glass mirrors to acrylic alternatives is driven by the need for impact resistance, reduced weight, and advanced machinability in custom fabrication. Specifying the correct material modifications—such as thickness, edge finishing, and mounting methods—without compromising optical clarity or structural integrity remains a primary challenge for fabricators. Improper customization often leads to warping, optical distortion, or mounting failures that ruin the installation.
Understanding how to manipulate a Custom Acrylic Mirror Sheet ensures structural integrity and optical clarity across diverse applications. This technical breakdown covers how to specify, machine, and install these materials tailored to exact project requirements, ranging from commercial retail displays to specialty LED integrations.
Acrylic mirrors offer 10x the break resistance of glass at half the weight, making them ideal for high-traffic and complex architectural applications.
Customization extends beyond basic cut-to-size dimensions to include CNC routing, laser-cut geometries, radius corners, and specialized edge polishing.
Optical performance is heavily dependent on thickness selection and substrate rigidity; failing to mount on a gets-flat surface results in a distorted "fun-house" reflection.
Proper installation requires specific non-solvent adhesives and calculated allowances for thermal expansion and contraction.
Comparing the specific gravity of acrylic to traditional silicate glass reveals a significant weight reduction. Acrylic weighs approximately half as much as glass of the exact same thickness. This weight reduction simplifies handling on the job site and expands mounting options on standard drywall or suspended ceiling structures where heavy glass would require structural reinforcement. Tensile strength and impact resistance are equally critical metrics. Acrylic withstands blunt force impacts up to ten times better than standard glass. This safety profile meets strict compliance standards for public spaces, schools, and gyms where shattered glass poses severe liability risks and potential for injury.
Machinability sets acrylic apart from standard mirrored glass. The material properties allow it to be drilled, routed, and thermoformed without shattering. Fabricators can achieve complex design geometries, internal cutouts, and curved profiles that are impossible or highly prone to failure with standard glass. This flexibility supports innovative architectural elements and custom display fixtures that require precise mechanical integration.
Evaluating the cost-to-lifespan ratio requires looking beyond the initial material purchase. Custom machining reduces on-site fabrication errors and labor time. Long-term savings accumulate through lower shipping costs, faster installation labor, and a drastic reduction in replacement frequency due to breakage. When a glass mirror breaks, the entire unit requires replacement. Acrylic absorbs daily abuse in retail and commercial environments, maintaining its structural integrity over a much longer lifecycle.
| Material Property | Standard Glass Mirror | Acrylic Mirror |
|---|---|---|
| Impact Resistance | Low (Shatters easily) | High (10x stronger than glass) |
| Weight (per sq ft at 1/4") | Approx. 3.27 lbs | Approx. 1.56 lbs |
| Machinability | Poor (Requires specialized wet cutting) | Excellent (Standard woodworking tools) |
| Flexibility | Rigid (Snaps under pressure) | Flexible (Can conform to slight curves) |
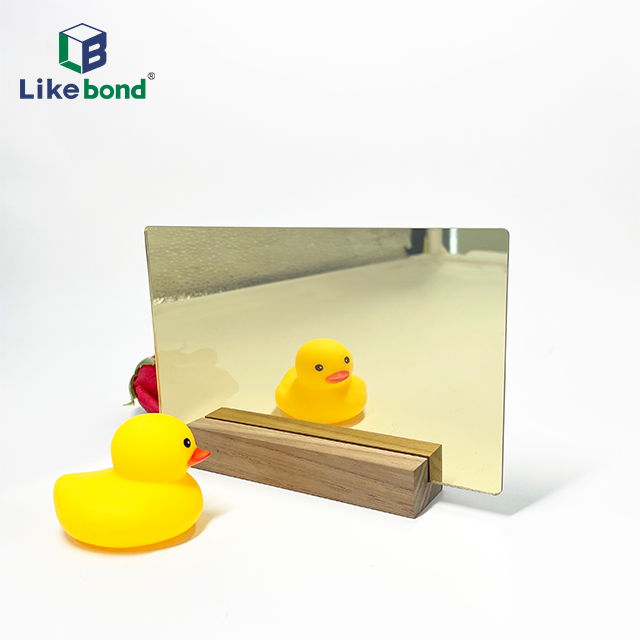
Standard sheet dimensions typically range up to 48 by 96 inches, with larger formats available for specialized applications. Specifying exact length, width, and thickness requirements dictates the foundation of the project. Standard cutting tolerances generally fall within +/- 1/16 inch when using standard panel saws. Precision cutting becomes necessary for flush-mount applications or when integrating the sheet into tight mechanical assemblies where dimensional deviation causes fitment issues. In these cases, fabricators utilize CNC equipment to hold tolerances as tight as +/- 0.015 inches.
When ordering cut-to-size materials, always account for the kerf of the blade. The kerf is the material removed by the saw blade itself, usually around 1/8 inch. Failing to account for kerf loss when breaking down a large sheet into multiple smaller panels will result in the final pieces being undersized. Always provide the fabricator with the exact finished dimensions required, rather than a cutting map, to ensure they calculate the kerf correctly.
CNC routers excel at creating custom shapes, internal cutouts, and precise architectural curves. The routing process handles thick sheets efficiently and provides exact dimensional repeatability for high-volume production. When routing acrylic, fabricators use single-flute upcut spiral bits designed specifically for plastics. These bits evacuate chips quickly, preventing the material from melting and welding back together behind the cutter. Feed rates and spindle speeds must be perfectly balanced; a common starting point is 18,000 RPM at a feed rate of 100 to 150 inches per minute.
Laser cutting offers distinct advantages for intricate designs and sharp internal angles. The heat from the laser simultaneously seals and flame-polishes the edge during the cutting process, eliminating the need for secondary edge finishing on complex geometries. However, laser cutting requires careful management of the focal point and assist gas to prevent scorching the reflective backing. Nitrogen is often used as an assist gas to keep the cut clean and prevent oxidation of the mirrored layer.
Specifying hole diameters and placement requires strict adherence to material tolerances. Holes should be placed at least 1.5 times the hole diameter away from the material edge to prevent cracking under stress. Countersinking allows for flush hardware integration, such as standoff mounts. Fabricators must use specialized acrylic drill bits featuring a 60-degree to 90-degree tip angle with a zero-rake angle. Standard wood or metal bits tend to grab the material as they break through the back side, causing chipping, cracking, or localized melting from excessive friction.
When drilling, use a slow, steady feed rate and clear the chips frequently. For holes larger than 1/2 inch, use a step drill bit or a hole saw designed for plastics. Always support the back of the acrylic sheet with a piece of scrap wood to prevent blowout as the bit exits the material. Never use cutting fluids containing solvents, as these will attack the acrylic and cause crazing (micro-cracking) around the hole.
Radius, or rounded, corners provide significant aesthetic and safety benefits in high-traffic environments by eliminating sharp 90-degree points that can catch clothing or cause injury. Routed edges and custom bevels add a finished look to frameless installations. Beveled edges refract light along the perimeter, creating a premium architectural finish, whereas standard routed edges prepare the material for seamless framing. When specifying a bevel, clearly indicate the angle (typically 45 degrees) and the depth of the bevel relative to the material thickness.
The method chosen for edge finishing directly impacts the visual quality and cost of the final product. Different applications require different levels of optical clarity along the perimeter.
Saw-Cut (Raw): Leaves a frosted, slightly rough edge with visible saw marks. Best for framed applications where edges remain completely hidden from view inside a channel.
Grinding / Hand-Sanding: A manual, on-site edge-smoothing technique used for field adjustments. It removes sharp burrs using progressive fine-grit sandpaper, starting at 150 grit and moving up to 400 grit.
Scraped/Sanded: An intermediate factory finish that ensures dimensional accuracy and removes saw marks. Fabricators use a specialized edge scraper or jointer, leaving a smooth but matte appearance.
Flame Polishing: Utilizes a high-heat hydrogen-oxygen torch to melt the edge slightly. The operator moves the flame rapidly across the sanded edge, resulting in a high-gloss finish ideal for exposed edges in retail or display settings.
Diamond/Buff Polishing: The highest tier of finishing. The material is passed over a precision diamond-tooled cutting head, followed by mechanical buffing with polishing compounds. This provides museum-quality optical clarity for premium architectural integrations.
The reflective layer requires protection from physical and chemical damage. Standard grey or white painted backings serve general indoor applications, providing a barrier against minor abrasions during handling. Heavy-duty marine backings provide enhanced moisture resistance for humid environments or marine applications, preventing the reflective metal from oxidizing. First-surface scratch-resistant hard coatings can be applied to the clear acrylic face during manufacturing. This polysiloxane coating significantly improves the material's resistance to abrasions from frequent cleaning, public interaction, and minor impacts.
Custom cut sheets are heavily utilized for dimensional lettering, logo cutouts, and point-of-purchase displays. The lightweight nature of the material allows for easy mounting on temporary or permanent retail fixtures using double-sided foam tapes rather than heavy mechanical fasteners. Integrating colored options—such as gold, bronze, or grey—delivers brand-specific aesthetics. These tinted reflections are frequently specified in hotels, resorts, corporate offices, salons, and luxury showrooms to match interior design palettes and create specific ambient lighting effects.
When designing dimensional lettering, fabricators often laminate the mirrored acrylic to a thicker substrate, such as PVC or sign foam, to create depth. The acrylic provides the high-gloss reflective face, while the substrate provides the necessary thickness for a 3D effect. This composite approach keeps the overall weight down while maximizing visual impact.
Infinity mirrors utilize a specific material stack: a two-way (see-through) Acrylic Mirror paired with a standard first-surface mirror behind it, with LEDs sandwiched between the two layers. The two-way mirror allows a percentage of light to pass through while reflecting the rest back against the rear mirror, creating the illusion of infinite depth. Edge-lit LED signs rely on routed channels in the clear acrylic face; the routed areas catch the light transmission, creating glowing text or graphics.
For backlit applications, fabricators use laser engraving or CNC scraping to remove the opaque protective backing and reflective layer of a second-surface mirror. This technical process requires precise depth control to remove only the backing without cutting into the clear acrylic substrate. Once the backing is removed, backlight or LED elements shine through cleanly without surface glare, creating crisp, illuminated logos or wayfinding elements.
Large-format, continuous mirror walls demand strict attention to optical flatness. In gyms and dance studios, multiple sheets are butted together to form a seamless reflection. Thicker sheets, with a minimum thickness of 1/4 inch, are strictly necessary to maintain optical flatness over large spans. Thinner materials will bow under their own weight or conform to minor wall imperfections, ruining the visual continuity and creating a disorienting reflection for users.
When installing continuous walls, installers must leave a small gap (typically 1/32 to 1/16 inch) between adjacent sheets to allow for thermal expansion. Pushing the sheets tightly against one another will cause them to buckle outward when the room temperature rises. The vertical seams can be left open, or covered with a specialized J-channel or H-channel molding to create a clean visual break.
Thickness directly dictates rigidity, which in turn controls optical clarity. Use 1/8-inch (0.118") material for small, framed displays where the frame provides structural support and prevents the material from flexing. Specify 1/4-inch (0.236") material for large wall installations, unsupported spans, or any application where the reflection must remain true over a distance. A direct correlation exists: thicker material resists bowing and provides a superior, distortion-free reflection.
If a project requires the lightweight benefits of 1/8-inch material but the optical clarity of a thicker sheet, the acrylic must be laminated to a rigid, flat substrate like MDF or aluminum composite material (ACM) prior to installation. This lamination process must be done using a uniform coat of approved adhesive applied with a notched trowel to prevent adhesive read-through (visible bumps in the reflection).
Second-surface mirrors represent the industry standard for acrylic. The reflective coating is applied to the back of the sheet, meaning the viewer looks through the clear acrylic to see the reflection. This protects the metallic layer from scratching and environmental degradation. First-surface mirrors feature the reflective coating on the front face. These are specified strictly for high-precision optical applications—such as projectors, lasers, or scientific instruments—where the slight ghosting or double-reflection caused by looking through the clear acrylic substrate must be entirely eliminated. First-surface mirrors are highly susceptible to scratching and require extreme care during handling and cleaning.
Moisture and high humidity degrade standard mirror backings over time, leading to delamination or oxidation of the reflective layer (often visible as black spots around the edges). UV exposure presents another risk for outdoor applications, potentially causing the clear acrylic to yellow or the backing to degrade and flake off. When specifying for exterior use, outdoor-grade acrylic substrates formulated with UV inhibitors and specialized protective marine backings are required to maintain longevity. Furthermore, outdoor installations must incorporate larger expansion gaps to accommodate extreme temperature swings between day and night.
Acrylic is inherently flexible. It will conform precisely to the irregularities of whatever mounting surface it is attached to. If the wall is wavy, the reflection will be wavy. Substrate preparation is non-negotiable. Installers must mount the material on a perfectly flat surface, such as high-density MDF, thick plywood, or perfectly floated Level 5 drywall, to ensure absolute flatness and a true reflection. Never attempt to mount acrylic mirrors directly over textured drywall, brick, or cinderblock without first installing a rigid, flat sub-wall.
Standard construction adhesives and solvent-based mastics will chemically attack and eat through the reflective backing, ruining the mirror from the inside out. This damage is irreversible and often takes several weeks to appear, long after the installer has left the site. Installation requires the use of approved, non-solvent, acrylic-safe mirror mastics. Alternatively, high-bond double-sided acrylic foam tapes provide secure adhesion without chemical degradation. When using tape, apply it in vertical strips to allow any trapped moisture behind the mirror to vent downward.
Acrylic possesses a high thermal expansion coefficient. It expands and contracts significantly with temperature changes. Failing to account for this causes bowing, warping, or stress fractures at mounting points. A standard rule of thumb is to leave an expansion gap of 1/16 inch per linear foot of material at the perimeter. Ensure drilled holes are oversized to allow the material to float on its fasteners during temperature fluctuations. Never overtighten screws; use rubber washers to hold the material gently against the wall without restricting its movement.
Substrate flatness verification (use of a 72-inch machinist’s straightedge to check for high spots).
Acclimation protocol (storing sheets flat on-site in the installation room for 24 to 48 hours prior to mounting).
Adhesive application pattern (apply vertical beads of mastic every 5-6 inches to prevent moisture trapping).
Expansion gap calculation (leave 1/16" per 12" of length/width at all perimeters).
Hole clearance allowance (drill holes 1/8" larger than the diameter of the mounting screws).
Protective masking removal (leave the front masking on until the installation is 100% complete to prevent tool scratches).
Verify substrate flatness with a straightedge before ordering large-format sheets to prevent post-installation distortion. Order material samples at various thicknesses to test optical clarity and rigidity in the actual installation environment. Consult directly with the CNC fabricator to confirm cutting tolerances and edge finishing capabilities for any exposed architectural integrations. Calculate thermal expansion gaps based on the specific temperature fluctuations of the installation site.
A: Yes, thin sheets can be scored and snapped using a plastic cutting tool. Thicker sheets require a table saw or circular saw equipped with a fine-tooth plastic-cutting blade to prevent chipping.
A: Use a minimum thickness of 1/4 inch for large areas and mount the sheet to a perfectly flat, rigid substrate like MDF. Allow for thermal expansion gaps at the edges.
A: Use only non-solvent, acrylic-safe mirror mastics or specialized double-sided mounting tapes. Solvent-based construction adhesives will destroy the reflective backing.
A: Yes, laser cutting is highly effective. The laser cuts cleanly through the acrylic and the backing simultaneously, often leaving a smooth, flame-polished edge without peeling the reflective layer.
A: Use a clean microfiber cloth and a dedicated plastic cleaner or a mixture of mild dish soap and water. Never use ammonia-based glass cleaners or paper towels.
A: Standard manufacturing sizes peak at 48 x 96 inches (4x8 feet), though some specialized manufacturers offer oversized sheets up to 72 x 120 inches for large continuous installations.
A: Yes, acrylic has roughly half the specific gravity of standard silicate glass, making it significantly lighter and easier to handle during fabrication and installation.


