

Views: 0 Author: Site Editor Publish Time: 2026-11-11 Origin: Site


When acrylic sheet is cut into panels or custom components, the finished edges do not always look as clear as the original surface. Saw cutting may leave rough marks, CNC routing can create small ridges, and laser cutting may produce uneven edges if the processing settings are not suitable.
These imperfections are particularly noticeable in transparent products. A panel may look clear from the front but have cloudy or frosted edges that affect the appearance of the finished assembly.
Edge polishing helps solve this problem. By removing cutting marks and smoothing the exposed surface, fabricators can improve edge transparency and achieve a cleaner finish.
However, polishing is not simply a final cosmetic step. The method also affects dimensional accuracy, corner definition, assembly quality, and the risk of stress-related cracking. Choosing the right process depends on the acrylic type, component shape, thickness, and intended application.
This guide explains why acrylic edges become cloudy, compares common polishing methods, and outlines practical steps for achieving c
onsistent results in commercial fabrication.
Edge Appearance: Cutting marks and surface irregularities scatter light, making transparent acrylic edges look white or cloudy. Proper finishing reduces this effect.
Different Polishing Methods: Diamond polishing works well for straight edges, flame polishing can finish suitable curves, and mechanical buffing offers flexibility for custom shapes.
Material Differences: Cast and extruded acrylic have different machining characteristics. Cutting conditions and polishing methods should be adjusted accordingly.
Stress Management: Excessive machining heat and improper polishing can contribute to crazing. Edge finishing should be combined with suitable material handling and stress-relief procedures.
Application Requirements: Retail displays, illuminated signs, protective covers, and architectural components may require different edge finishes.
Acrylic sheet is known for its transparency, but cutting can change the appearance of its exposed edges.
The problem usually comes from the condition of the cut surface rather than a loss of transparency throughout the entire sheet.
When a saw blade or CNC router cuts through acrylic, the tool removes material through mechanical shearing. If the blade is dull, the feed rate is unsuitable, or the workpiece is not properly supported, the cut may contain scratches, chips, and uneven tool marks.
Laser cutting creates a different type of edge. The material is heated and removed along the cutting path. Depending on the sheet grade and laser settings, the resulting edge may be smooth and glossy or show visible ripples and unevenness.
These surface irregularities affect how light interacts with the edge.
A rough surface scatters incoming light in multiple directions instead of allowing it to pass through in a more consistent way. This is why an unfinished acrylic edge can look milky even when the main surface remains transparent.
The difference between a rough edge and a polished edge is largely related to light scattering.
When light reaches an uneven acrylic surface, small ridges and scratches change the direction of the reflected and transmitted light. The result is a less uniform appearance.
Polishing reduces these irregularities by removing or leveling the damaged surface layer. Once the edge becomes smoother, light can pass through with less unwanted scattering.
The improvement is especially noticeable in clear acrylic components used for display cases, transparent supports, and illuminated products.
For projects where appearance matters, selecting a suitable Acrylic Sheet is only the first step. The cutting and finishing processes also need to match the final visual requirements.
Edge finishing is particularly important in edge-lit signs and light guide applications.
In these products, LEDs are positioned near the edge of an acrylic panel to introduce light into the material. The light then travels through the panel and is distributed according to its surface treatment and optical design.
A rough or poorly finished input edge can reduce light coupling efficiency and create uneven illumination near the perimeter.
A smooth, properly prepared edge can improve the consistency of light entering the panel. However, the final illumination also depends on LED positioning, panel geometry, surface patterns, and diffuser design.
For this reason, fabricators should evaluate the complete lighting system rather than treating edge polishing as the only factor affecting brightness.
The difference is visible, but it also affects how the finished component is handled and assembled.
An unfinished saw-cut edge often looks frosted or uneven. Depending on the cutting process, it may contain visible scratches, small chips, and rough tool marks.
A polished edge has a smoother surface and a more uniform appearance. Transparent acrylic can achieve a glossy, glass-like finish when the material and polishing process are suitable.
This is important for products where the edges remain exposed, such as transparent display stands, jewelry cases, decorative furniture, and protective covers.
Cut edges may contain sharp corners and small burrs. Removing these defects makes components easier to handle during assembly and reduces the risk of accidental cuts.
Edge preparation also matters when two acrylic components need to be bonded together. A straight, clean mating surface helps create a more consistent joint.
However, polishing alone does not guarantee a strong bond. Joint fit, adhesive compatibility, material stress, and bonding conditions must also be considered.
Machining can leave residual stress around the cut area. Scratches and sharp notches may also act as stress concentration points.
When acrylic is exposed to incompatible solvents, cleaning agents, or bonding chemicals, these stressed areas may develop fine cracks known as crazing.
Proper cutting and edge preparation can reduce some surface defects, but polishing does not remove all internal stress or make acrylic resistant to every chemical.
For critical bonded components, fabricators should consider whether annealing is required. The appropriate stress-relief cycle depends on the material grade, thickness, and processing history.
There are three commonly used approaches: flame polishing, diamond edge polishing, and mechanical sanding and buffing.
Each has a different role in production.
Flame polishing uses controlled heat to soften the outer layer of acrylic. Surface tension then helps smooth the heated area, producing a glossy appearance after cooling.
This method can be useful for suitable curved edges, internal cutouts, and shapes that are difficult to process with straight-edge polishing equipment.
However, flame polishing requires experienced operators and suitable process controls.
Excessive heat can cause bubbles, discoloration, deformation, and additional internal stress. Sharp corners may also become rounded if the flame is not controlled properly.
Flame polishing should therefore be selected according to the acrylic grade, component geometry, and subsequent assembly requirements.
For parts that will be solvent bonded, additional stress management may be necessary before assembly.
Diamond polishing uses precision cutting tools to remove a thin layer of acrylic from the edge.
The process produces a smooth, uniform surface and is particularly suitable for straight edges and bevels.
It is commonly used when fabricators need consistent results across repeated components.
Another advantage is dimensional control. Compared with manual polishing, properly configured diamond equipment can maintain more consistent edge geometry across production batches.
However, diamond polishing is less suitable for complicated internal curves and irregular three-dimensional profiles.
The quality of the result still depends on tool condition, machine settings, sheet stability, and correct material preparation.
Mechanical polishing is often used for components that cannot be processed easily with straight-edge equipment.
The process usually begins with sanding to remove deeper tool marks. Finer abrasives are then used progressively to reduce scratches before the final buffing stage.
A rotary cloth wheel and suitable polishing compound can restore a glossy finish to prepared acrylic surfaces.
This method is useful for curved components, thick acrylic blocks, custom furniture parts, and small production runs.
The main challenge is maintaining consistent pressure and avoiding excessive frictional heat.
If the operator presses too hard or works on one area for too long, the material may soften and develop smears or uneven gloss.
Cast and extruded acrylic are both PMMA materials, but their manufacturing processes create different processing characteristics.
These differences should be considered before choosing a polishing method.
Extruded acrylic is manufactured by pushing molten material through a forming die and controlling its thickness through downstream processing.
Its thickness consistency can be useful for projects involving repeated components and fixed dimensions.
During cutting and polishing, however, heat management is important. Excessive friction may soften the material and cause it to stick to cutting tools or produce uneven edges.
Flame polishing also requires careful control because the material may soften quickly under localized heat.
For production work, suitable cutting conditions and consistent edge preparation help reduce these problems.
Cast acrylic is produced through polymerization in molds. It generally has a higher molecular weight than extruded acrylic and is commonly selected for applications involving detailed machining and fabrication.
It can provide good machining characteristics when processed with suitable tools and feed conditions.
Cast acrylic is often considered for thicker components, engraved parts, and applications where the finished appearance is important.
However, cast acrylic still requires proper heat management. It can also develop machining stress or surface defects if tools are dull or processing conditions are unsuitable.
The decision should be based on the finished component rather than assuming one material is always better.
For Repeated Flat Components: Extruded acrylic may be suitable where thickness consistency and production efficiency are priorities.
For Detailed Machining: Cast acrylic may be preferable when the design requires specific machining or engraving characteristics.
For Optical Applications: Evaluate the actual sheet grade, surface condition, thickness, and polishing result using samples.
Our transparent acrylic sheet is one option for projects where transparency and processing suitability are important.
A consistent finishing process starts before the polishing wheel is used. Deep saw marks cannot be removed efficiently through buffing alone.
Inspect the component and identify scratches, chips, uneven sections, and burrs.
If the edge contains significant cutting marks, use suitable trimming or scraping methods to remove the damaged material.
The goal is to create a straight and even surface before moving to finer finishing operations.
Keep the main sheet surface protected during handling to prevent additional scratches.
When mechanical polishing is required, begin with an abrasive appropriate for the condition of the edge.
Coarser abrasives remove deeper marks, while finer grades reduce the scratches left by earlier stages.
Use a firm, flat backing block when working on straight edges. This helps maintain the original edge geometry and prevents rounded corners.
Wet sanding may be suitable for certain acrylic grades and processes. If used, ensure that the workpiece and surrounding equipment are handled safely and that moisture is removed before bonding or further processing.
Once the edge has been properly prepared, select the final polishing method.
Straight edges may be processed with diamond polishing equipment. Suitable curves can be finished through controlled flame polishing, while complex shapes may require mechanical buffing.
Use polishing compounds designed for acrylic and follow the equipment manufacturer's recommendations.
The objective is to achieve the required surface appearance without overheating or distorting the component.
After polishing, remove compound residue using a cleaner approved for acrylic.
Use a clean, soft microfiber cloth and avoid aggressive solvents or unsuitable household glass cleaners.
Inspect the edge under consistent lighting. Check for remaining scratches, haze, uneven gloss, rounded corners, and visible cracks.
For repeat production, retain an approved sample as a reference for subsequent batches.
If the finished component will be bonded with solvent cement or another chemical adhesive, review the material supplier's stress-relief recommendations.
Annealing may be appropriate for components with significant machining or forming stress.
The temperature, holding time, and cooling procedure should be based on the acrylic grade and thickness. A universal heating schedule should not be applied to every component.
Even with suitable equipment, small changes in processing conditions can affect the final result.
This usually indicates that the edge still contains scratches or uneven surface marks.
The initial cutting quality may be poor, or the sanding stages may not have removed the previous abrasive marks completely.
Review the preparation process before increasing polishing pressure.
Waves may result from inconsistent feed rates, uneven manual pressure, machine vibration, or excessive local heating.
Check the stability of the workpiece and the condition of the polishing equipment.
For large production runs, automated processing may help improve repeatability.
Smearing commonly occurs when friction generates excessive heat.
This may happen during buffing or machining when the tool speed, pressure, or feed rate is unsuitable.
Reduce heat build-up and check whether the polishing compound and equipment are appropriate for the material.
Crazing may appear when residual stress interacts with an incompatible chemical or bonding agent.
It can also be related to poor cutting conditions, unsuitable annealing, or excessive mechanical stress.
Do not assume that a glossy edge is automatically free from internal stress. For bonded components, material preparation and adhesive compatibility need to be evaluated together.
Excessive polishing can remove more material than intended, especially around thin edges and sharp corners.
Use controlled pressure and appropriate fixtures to maintain the original dimensions.
Visual inspection is a useful starting point, but commercial production may require more consistent acceptance criteria.
Inspect the edge under controlled lighting.
Look for cloudy areas, visible scratches, polishing marks, and uneven gloss.
For transparent components, viewing the edge against a consistent background can make defects easier to identify.
Measure the finished component against the drawing.
Confirm that polishing has not excessively changed the width, thickness, bevel, or corner shape.
This is particularly important for components that must fit into frames or connect with other acrylic parts.
Inspect the edges and nearby surfaces for fine cracks or crazing.
For critical applications, additional testing may be necessary to evaluate residual stress and chemical compatibility.
The inspection method should match the product's intended use and quality requirements.
Before starting mass production, agree on an acceptable edge appearance with the buyer or project engineer.
A physical sample can help define the required clarity, gloss, dimensions, and permissible imperfections.
This reduces disagreements when multiple production batches are involved.
The required finish depends on how the acrylic component will be used.
Retail Display Cases: Transparent display cases often require smooth, polished edges because the joints remain visible to customers. Diamond polishing and additional buffing may be suitable depending on the design.
Illuminated Signage: Edge quality can affect how light enters an acrylic panel. The input edge should be prepared according to the LED arrangement and optical design.
Architectural Components: Partitions and decorative panels may require clean edges for appearance, safe handling, and accurate installation.
Acrylic Furniture: Thick panels and custom-shaped components may need a combination of machining, sanding, and mechanical buffing.
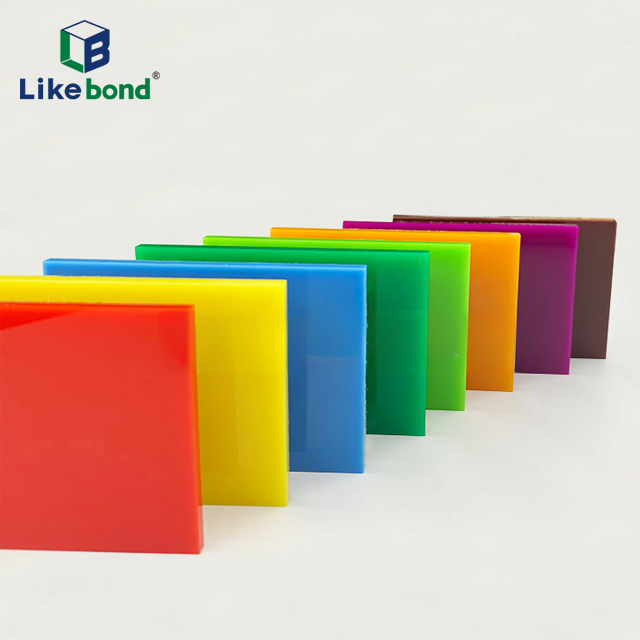
Decorative Acrylic Products: Colored and patterned sheets require attention to both the visible surface and exposed edges. The selected finishing process should preserve the intended color and decorative appearance.
For projects requiring specific visual effects, our color acrylic sheet range includes different color and decorative options.
The final edge appearance depends partly on the condition of the original sheet.
Variations in thickness, surface condition, material composition, and internal defects can affect machining consistency.
A sheet with an uneven surface or inconsistent dimensions may require additional preparation before it can be fabricated accurately.
For transparent products, internal bubbles, inclusions, and other visible defects may also affect the finished appearance. Polishing the edge cannot correct defects inside the sheet.
This is why buyers should evaluate raw material quality before starting large production runs.
Thickness Consistency: Stable sheet dimensions help fabricators maintain accurate cutting and assembly tolerances.
Surface Condition: Protective films and proper handling help prevent scratches before processing.
Material Identification: Confirming whether the sheet is cast or extruded helps operators select suitable cutting and finishing conditions.
Sample Approval: Testing a representative sheet before mass production helps identify possible machining and polishing problems.
Choosing a suitable material at the purchasing stage can reduce rework and improve consistency across finished components.
Edge polishing plays an important role in acrylic fabrication. It improves the appearance of cut edges, reduces visible surface marks, and helps prepare components for assembly.
The right method depends on the material, edge geometry, production volume, and required finish. Diamond polishing is suitable for many straight edges, flame polishing can be used on suitable contours, and mechanical buffing offers flexibility for custom components.
However, polishing should not be treated as a substitute for proper cutting, stress management, or material inspection. A consistent result requires attention to every stage, from sheet selection to final quality control.
For buyers and fabricators, starting with suitable acrylic sheet specifications makes the entire process easier to manage.
Acrylic edges often look white because cutting creates scratches, chips, and uneven surface marks. These irregularities scatter light, producing a cloudy or frosted appearance. Proper sanding and polishing can reduce this effect.
No. Flame polishing can be used on suitable acrylic materials, but the process requires careful heat control. Some sheets are more sensitive to localized heating and may develop deformation or residual stress. Always confirm processing suitability before production.
Neither method is universally better. Diamond polishing is generally more suitable for straight edges requiring consistent geometry and surface quality. Flame polishing can be useful for suitable curves and irregular profiles. The choice depends on the component design and production requirements.
Polishing can remove minor scratches and machining defects that may act as stress concentration points. However, it does not automatically restore material strength or eliminate internal stress. Structural performance also depends on thickness, design, machining, and assembly conditions.
Cloudiness or crazing after bonding may be caused by residual machining stress, incompatible adhesives, or unsuitable bonding conditions. Review the material specifications, edge preparation, and stress-relief requirements before applying solvent cement.
Yes, suitable extruded acrylic can be flame polished, but the process requires careful control. Excessive heat may soften the edge, distort corners, or increase the risk of stress-related defects.
Use clean tools, suitable abrasives, and polishing compounds designed for acrylic. Keep the workpiece properly supported and avoid excessive pressure. Protect the main sheet surfaces during handling and remove polishing residue with an acrylic-safe cleaner.
Confirm the material type, thickness, dimensions, surface condition, and intended finishing method. If the project requires a high-gloss transparent edge, request samples and test the proposed processing method before ordering in bulk.
At Likebond, we manufacture and supply acrylic sheets, acrylic mirrors, and decorative advertising materials for different commercial applications.
Our production facilities use automated manufacturing and processing equipment. We also support material consultation, sampling, custom colors, and CNC cutting according to project requirements.
When selecting acrylic sheets for precision fabrication, we recommend confirming the material type, thickness, dimensions, and intended processing method before production begins.
Contact our team with your drawings or material requirements to discuss a suitable acrylic sheet solution.


